Fence Repair Summerville is a necessary maintenance service for your yard and property. It includes repairs and replacement of fence components, resecuring loose posts, cleaning and staining the wood, and replacing damaged chain link fabric.
Fixing holes and cracks in your fence is a relatively simple process. First, sand the hole or crack and wipe away any sawdust. Then, fill in the area with wood putty and let it dry.
Over time, weather, animals and regular use take a toll on fences, making them look old and worn. A well-maintained fence can add value to your home and keep pets and children safe. Fence repair is less costly than installing a new fence and it allows you to extend the lifespan of your current fence.
The most common damage is to posts and footings. If a post has a crack or is displaced from its concrete footing, it must be replaced. This involves digging out the old post and footing, adding a new post and concrete, then reattaching the rails.
A fence contractor should remove all the old materials before re-building the fence. He should also make sure the footing is solid and that it is adequately supported by the concrete. He may recommend adding shims to the footing to raise it from the ground and prevent future movement.
Typical wood fences require regular staining to preserve the wood and protect it from rot. Staining is a simple job for a professional, but it is important to use the right stain and follow all recommended cleanup steps. Staining can be rolled on or sprayed on, so you should discuss your preferences with your contractor.
If your fence has decorative sections, a professional can weld them together, but you might be able to do it yourself with an epoxy repair putty that’s made for metal. Be sure to clean off any rust that might be present before applying the repair putty.
A wind storm can blow over fence panels. If the damage is limited to one panel, you might be able to fix it by screwing blocks of wood to the posts on either side of the damaged panel. This will support the panel and allow it to fall onto the blocks.
If the fence is in danger of collapse, a pro should install support braces or lay a concrete foundation ($125 to $2,300). In general, it’s best to avoid repairs on older wood fences. They tend to have more problems down the road than newer fences.
Rails
Fences can take a beating, especially if they’re made from natural materials. While untreated wooden fences are prone to damage from pests, mold and moisture, even treated cedar and chain link fences aren’t immune to problems. One of the most common kinds of fence repair concerns is damage to the rails that run from post to post across the top and bottom of a fencing system. A little bit of damage to these can weaken the entire structure and cause serious problems.
Wooden fence rails that aren’t supported by a strong support system can be vulnerable to rot and sagging. This can be a serious issue and should be addressed immediately. If the problem extends to multiple rails then a support called a T-brace can be used to strengthen the damaged area of the fence. This is simply a set of screws and wood that aren’t part of the original fencing system but provides extra support for the rails in the affected area.
Before attempting to repair damaged fence rails, apply a generous coating of a good wood preservative to the area. This will keep the rot from spreading and damaging other parts of the fence. If the rotting is extensive and has caused the rail to break away from the fence posts, it may need to be replaced.
Start by removing the wire ties that connect the fence fabric to the top rail section you need to replace. Next, using a hacksaw or reciprocating saw, cut the old rail off at the damaged section. Make sure your cut is level and that you leave one tapered end and one non-tapered end on the new rail sections.
Once the damaged sections of the fence rail are removed, use a power drill to screw metal T-braces into place on both sides of the damaged area of the rails. Then nail the repaired section of the fence rail to the post with galvanized nails. Finally, add a generous coating of caulk to the top and sides of the repaired rail to help seal out moisture.
Panels
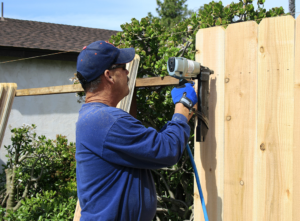
Fence panels offer a simple, quick and cost-effective way to create an attractive garden boundary, particularly in urban settings where space is limited. They can be manufactured from a wide range of materials to meet aesthetic and performance requirements, with wood, metal, vinyl and composite options available. Each material has its own advantages and disadvantages in terms of durability, installation and maintenance costs, as well as environmental conditions – for example, wooden fences are not ideal in humid or rainy environments, while metal fencing can be susceptible to rusting.
If you have a damaged fence panel, it is important to determine whether the damage is repairable or if it would be better to replace the panel. If it’s repairable, a number of techniques can be used to strengthen the damaged section of your fence, depending on the type of damage and how severe it is.
For example, if a fence picket (or slat) has simply pulled loose from the stringers (or horizontal rails), it may be possible to reattach it by using new fasteners. However, if the fence stringer itself has been damaged or weakened, you will need to install a replacement.
The installation process for fence panels will vary according to the type of fencing chosen, with traditional wooden panels requiring more time and effort than pre-fabricated metal or vinyl ones. Understanding the specific installation requirements for each material will enable you to plan effectively and avoid unforeseen issues during your fencing project.
Once installed, it’s crucial to regularly maintain your fence to extend its lifespan and protect your property. Different fence materials require different maintenance approaches, such as staining wood to protect it from rot and mould, or applying protective coatings to metal fences to prevent rusting.
In addition to enhancing the visual appeal of your garden, maintaining your fence will also help to deter criminal activity and reduce the risk of vandalism and theft. This can be achieved by incorporating security features into your fencing system, such as anti-climb spikes, close-knit patterns that deter hand grips and taller fence heights to discourage unauthorised access.
Mesh
For the most durable and secure repair of a mesh tent hole or rip, the best solution is to buy some actual mesh netting patch tape. This type of patch has adhesive on both sides and can be cut to fit the area of the rip or hole. Other solutions, such as using duct or masking tape, are more likely to come loose and make the problem worse. The mesh netting patch also has the advantage of being very light and is very thin, making it much easier to pack when traveling.
A mesh must be clean to print well, as it needs to have all its edges connected and not overlapping each other (naked or non-manifold), no overlapping triangles, with all the faces of all the triangles properly and consistently oriented. For this reason, a good way to start cleaning the mesh is by running the Mesh Repair function available in the Mesh menu.
This process will automatically remove degenerate triangles, which are a waste of the polycount and can cause visual artifacts. It will also orient all the triangles’ faces consistently on the mesh. Finally, it will close all holes and bridging gaps.
Depending on the quality of the mesh, it may still need some manual work to fix. For example, it is possible that some of the overlapping triangles are not correctly oriented and may need to be manually stitched together with a high tolerance setting. Another possibility is that some open holes need to be filled and that the bridging gap between adjacent triangles should be manually fixed by creating or deleting triangles.
Another possible option is to run the Stitch function from the Fix Wizard and to use a very high tolerance setting. Finally, it is also possible to manually mark overlapping or intersecting areas and then delete them by selecting the corresponding area with the Select Surfaces icon or the Tools Marking menu Overlapping and Intersecting.
For more advanced repairs, it is possible to import the CAD model into Netfabb and then to run its Analysis – Inspector, which will display all the errors that need to be corrected, and a repair menu with different options. These can include fixing overlapping or intersecting triangles, filling holes and bridging gaps, and re-meshing the model to improve its stability.